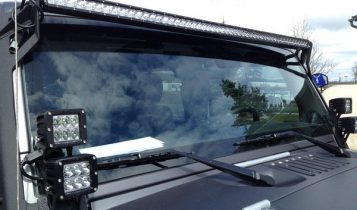
Let’s face it. We all want to save an extra penny here or there and as a result, many of us have resulted in DIY projects. For example solving the simplest problems at home like replacing a bulb to complex problems like installing a spotlight on a car.
The good news about doing it yourself tasks is that you get to learn something new and now you can pass this vital knowledge to your son or daughter if they show interest in what you do.
A car spotlight can be shopped from the local store or an e-commerce store. Every purchase usually comes with a set of instructions written in multiple languages including English. Despite this, some skill is required when it comes to the correct installation of the car spotlight especially on a custom car. Why? You don’t want to mar the chrome on your car.
Lightbar Liaison has created a how-to guide for installing an Appleton spotlight, making your work easier.
Step One – Unpack the contents
Once you receive your purchase, unpack the contents. Inside you should find templates and how to instructions. Using the templates, you can easily locate where screws and outer bracket will be positioned on the car frame. Make sure that you position the template correctly as mistakes could lead to damage. Mark the locations where screw holes will be on the corner post to ensure proper positioning of the car spotlight.
Use a scriber to mark the locations of the screw holes through the template. To ensure that the holes are well positioned, position the template well when making marks with the scriber. How do you achieve this? Make sure your fingers are steady.
Step Two – Drill the screw holes
Using the appropriate drill bit (9/64 inch), drill through the corner post carefully to avoid coming into contact with the windshield frame. Use two No.10 tapping screws to hold the bracket at the selected position. Next, screw in the unit before the bracket is fastened. You can fasten the brackets using the drill jig and self tapping screws.
For the large hole, use a one and a half inch drill bit. Make sure that the shank is parallel to the roadway. This will give the lamp control shaft a correct alignment when drilling through the corner post. It is essential to be steady when doing this as extensive damage to the corner post will result in repair charges.
Continue drilling through the corner post outer metal. Once you have achieved the right depth, remove your drill from the jig and examine the location for any wires. These are usually fitted within the left post but not in convertibles. Push the wires aside to continue drilling.
Step Three – Disassemble the spotlight handle
Now that you are done with drilling, remove both the drill and jig. Proceed by removing the screw at the handle plus nuts and bolts positioned close to the handle front. This will allow you to disassemble the spotlight handle. Using caution, insert shaft and tighten using an adjustable wrench. Make sure that you don’t damage the chrome. Slide the friction bracket at the end of the handle shaft and fit into place. Be patient as you do this to eliminate chances of making any damage.
Step Four – Drill to fit inner bracket
From inside the car, drill holes using the 9/64 inch bit. Fasten the inner bracket using two self tapping screws. Slide the friction bruising into place and screw it in but don’t tighten it too much.
Step Five – Connect the spotlight to the car wiring
Start by replacing the spring, eyelet assembly and screw in the handle top to regulate friction. Pull the wiring via the ¼ inch hole drilled on the dashboard. Connect wires to your dome light fuse and you are done. Test to ensure it’s working.
With a spotlight on your car, you can finally illuminate the road clearly at night. Furthermore, you can be able to watch the sides of the road and eliminate chances of an animal surprising you while driving. This will surely ensure that you get to avoid a head on collision.

